
Set up a measurement record
Make a rough outline, give the corners letters, and work clockwise. Record the room name, date, units and the person measuring. Use millimetres throughout your notes. Mark estimates so they are not mistaken for checked measurements.
- Include recesses, columns, chimney breasts and fixed cupboards.
- Keep photos keyed to your sketch, avoiding personal information.
- Record inaccessible edges and limitations of your equipment.
Measure an overall span and its parts
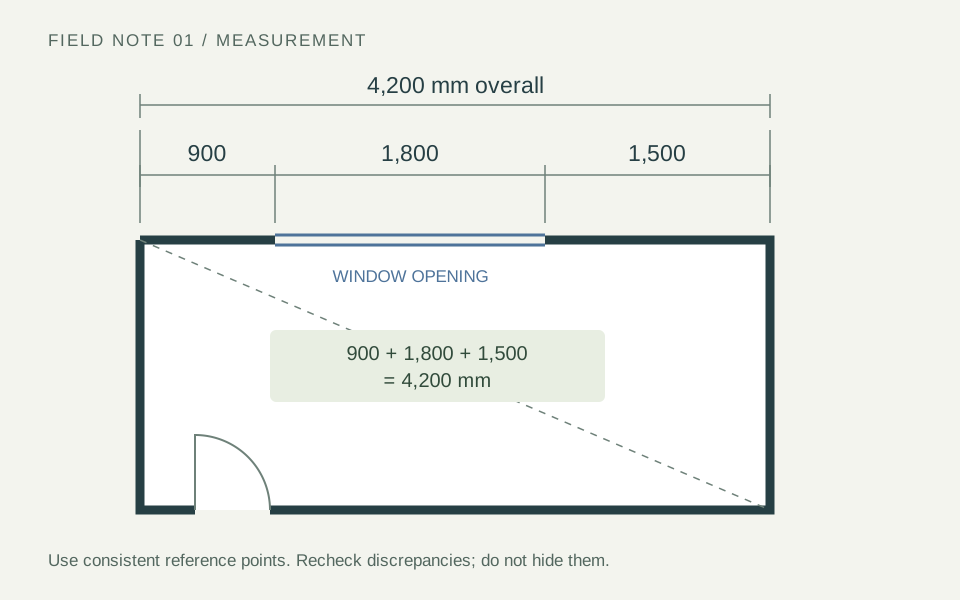
Use consistent finished surfaces as reference points. For a wall with a window, record the corner-to-opening distance, opening width and remaining segment, as well as the overall span.
Example: 900 + 1,800 + 1,500 = 4,200 mm. If an independent overall reading is 4,240 mm, the notes have a 40 mm discrepancy. Check reference points and repeat the readings; do not distribute the difference across the drawing just to make it close.
Locate openings and heights
For a door, note its width, distance from a named corner, hinge side and swing direction. Distinguish the clear opening from the outside of the frame. For windows, add sill and opening heights. Record ceiling heights, slopes and bulkheads where they change.
Mark radiators, service boxing and fixed obstructions. Photograph details you cannot describe clearly, but do not rely on a photograph for scale.
Check the shape, not just the perimeter
Where accessible, measure diagonals between identified corners and compare them with the wall dimensions. This can reveal an inconsistency, but equal diagonals alone do not prove that an arbitrary room is rectangular. Do not force an irregular room into right angles because it is easier to draw.
Keep the notes with the plan
Label assumed features and unresolved differences. Before ordering fitted items, arranging construction or relying on a tight clearance, have critical dimensions and site conditions checked for that purpose.
Download the field measurement checklist. Next, use the 2D-to-3D drawing guide to turn those measurements into a plan.
Those same wall, opening and height measurements can feed the heat loss calculator from your floor plan. Add construction and temperature information and check exposed boundaries; do not infer insulation from the shape of the room.
The floorplan-based insulation and energy upgrade guide reuses those areas for thermal comparisons and quantities. Record the actual construction separately from the measured outline.
Continue your planning
Put these checks into practice: work through a measured room layout.